 Chop Sampler
User Guide / Sequencer
Sequencer
The  SEQ tab is where you record and edit patterns. Each pattern is a sequence. Record live from the pads, draw notes in, and automate knobs and faders.
SEQ tab with a 2-bar drum pattern: sequence selector at the top, counter and tool icons, lanes labeled A01, A02..., colored notes with waveforms, and the bottom row CLEAR / COPY / HALF / DOUBLE / ALL / SNAP / QUANT.
sequencer-main.mp4
The SEQ screen
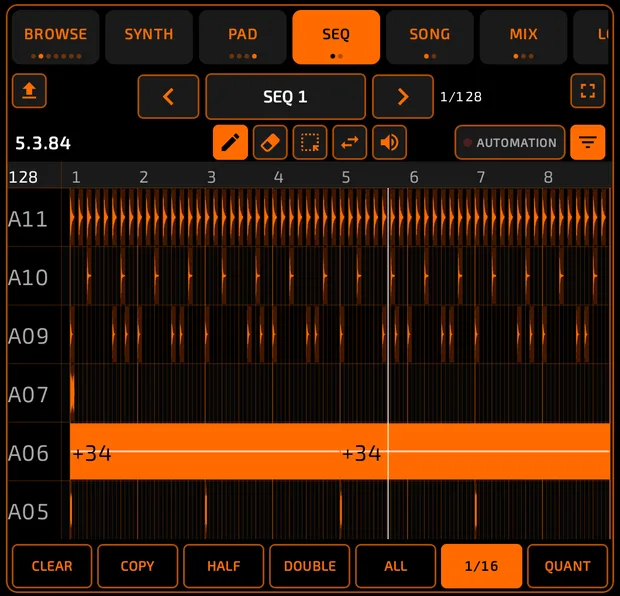
- Top bar: an export stems icon (left), the sequence selector (middle) and the full-screen icon (right).
- Tool row: the position counter (bar.beat.sub, for example 1.1.00), the five tools, the
 AUTOMATION chip and the filter icon.
 - Grid: one lane per pad, labeled A01 to H16, with A01 at the bottom.
- Bottom row:
 CLEAR,
  COPY,
COPY,  HALF,
HALF,  DOUBLE,
  ALL,
ALL,  SNAP,
SNAP,  QUANT.
Notes take their pad's color. Sample notes show the sample's waveform; synth notes show a mini melody line, and pitched notes show their offset (for example +7). Soft notes look faint, loud notes solid.
 The filter icon (on by default) shows only lanes that have notes. Tap it off to see all 128 lanes. The bank buttons jump the grid to that bank's lanes.
Sequences

- There are 128 sequence slots, SEQ 1 to SEQ 128. Every slot already exists; an empty one is just a blank pattern.
- Use ‹ and › beside the name to switch. While playing, the switch waits for the end of the current loop (the name flashes until then).
- Rename: tap the name, type, APPLY.
- Each sequence has its own name, length, tempo, notes and automation.
Copy a sequence
- Tap COPY.
- Pick the target slot (it defaults to the first empty one).
- Tap APPLY. The copy is named after the original with -01 added, and opens.
Change the length
- DOUBLE doubles the length and copies the notes into the new half (up to 64 bars).
- HALF halves it. Notes past the new end are removed.
- New sequences start at the length set in Settings > SEQUENCER DEFAULTS > NEW SEQ BARS (1 to 32 bars).
Clear a sequence
CLEAR removes all notes and resets the sequence (it keeps the tempo). It also removes the sequence from your song.
Tempo, swing and time signature

- Tap the BPM readout in the middle strip to tap a tempo. Drag it up or down to fine-tune.
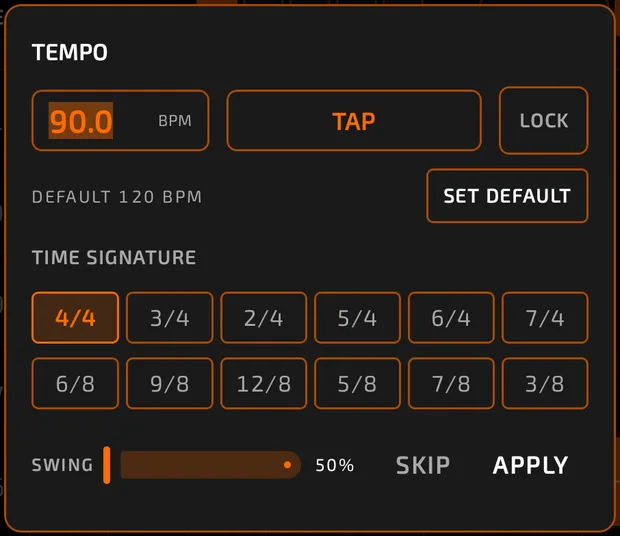
- Long-press it to open TEMPO:
- Type a BPM (20 to 300), or use TAP.
- LOCK stops accidental tempo changes.
- SET DEFAULT makes this the starting tempo for new projects.
- TIME SIGNATURE: 4/4, 3/4, 2/4, 5/4, 6/4, 7/4, 6/8, 9/8, 12/8, 5/8, 7/8, 3/8.
- SWING: 50% (straight) to 75% (full shuffle).
- Tap APPLY.
Tempo belongs to each sequence. Time signature and swing apply to the whole project.
Metronome and count-in
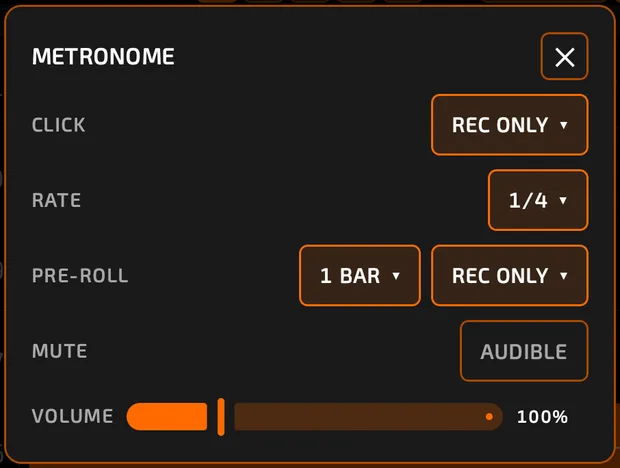
Tap the metronome button (square with a red light) to turn the click on or off. Long-press it for  METRONOME:
| Setting | Choices |
|---|---|
| CLICK | REC ONLY or PLAY + REC |
| RATE | 1/4, 1/4T, 1/8, 1/8T, 1/16, 1/16T, 1/32, 1/32T |
| PRE-ROLL (count-in) | OFF, 1 BAR, 2 BARS, 4 BARS, before REC ONLY or PLAY + REC |
| MUTE | AUDIBLE or MUTED (the light still flashes) |
| VOLUME | 0 to 400% (double-tap for 100%) |
During a count-in, the counter shows CUE.
Recording
How to record a beat
- Set the tempo and turn on the metronome.
- Tap
 REC. It blinks (armed).
 - Tap
 START (or
  PLAY). After the count-in, play the pads.
 - The pattern loops. Keep adding parts, or tap REC again to stop recording and keep playing.
REC vs OVDUB
- REC (overwrite) replaces notes as the playhead passes over them on the first pass, then switches to adding on the next loops.
 OVDUB always adds notes on top.
- Tap either one while playing to punch in. Tap it again to punch out.
- Recording can be undone.
How notes are recorded
- Note starts snap to the SNAP grid when SNAP is on.
- Held notes record their real length.
- A hit slightly before bar 1 lands on bar 1.
- Hitting the same pad on the same step replaces the old note.
SNAP (grid)
The SNAP chip sets the grid for recording and drawing. Tap it and choose OFF, 1/4, 1/4T, 1/8, 1/8T, 1/16 (default), 1/16T, 1/32, 1/32T, 1/64 or 1/64T.
With SNAP off, timing follows Settings > SEQUENCER TIMING > RESOLUTION.
QUANT (fix timing)
- Optionally select some notes (otherwise all notes are used).
- Tap QUANT.
- Pick a grid: straight (STR) or triplet (TRP).
- Optionally add HUMANIZE: NOTES (timing) and VEL (volume).
- Tap APPLY.
Quantize moves note starts and keeps their lengths.
Editing tools
The five tool icons:
| Tool | What it does |
|---|---|
 Pencil Pencil | Tap empty space to add a note. Tap a note to delete it. Drag a note to move it (in time, or to another pad's lane). |
 Erase Erase | Tap a note to delete it. |
 Select Select | Tap notes or drag a box to select them. |
 Resize Resize | Drag the start or end of a note. |
 Velocity Velocity | Drag a note up (louder) or down (softer). A VEL readout shows the value. |
- If you grab a note that's part of a selection, the whole selection moves, resizes or changes velocity together.
- Long-press a note for CUT / COPY / PASTE.
- Tap a lane's label (for example A01) to hear the pad and select all its notes.
- ALL selects every note.
- PASTE puts notes at the playhead. The clipboard carries over to other sequences.
Moving around
- Pinch sideways to zoom in time. Pinch up and down to make lanes taller or shorter.
- Drag with two fingers to scroll.
- Touch or drag the ruler to move the playhead.
There's no step-record mode or nudge button: draw notes with the Pencil and drag them to move them.
Undo and full screen

 undo and redo.
  opens the sequencer full screen,
  closes it again.
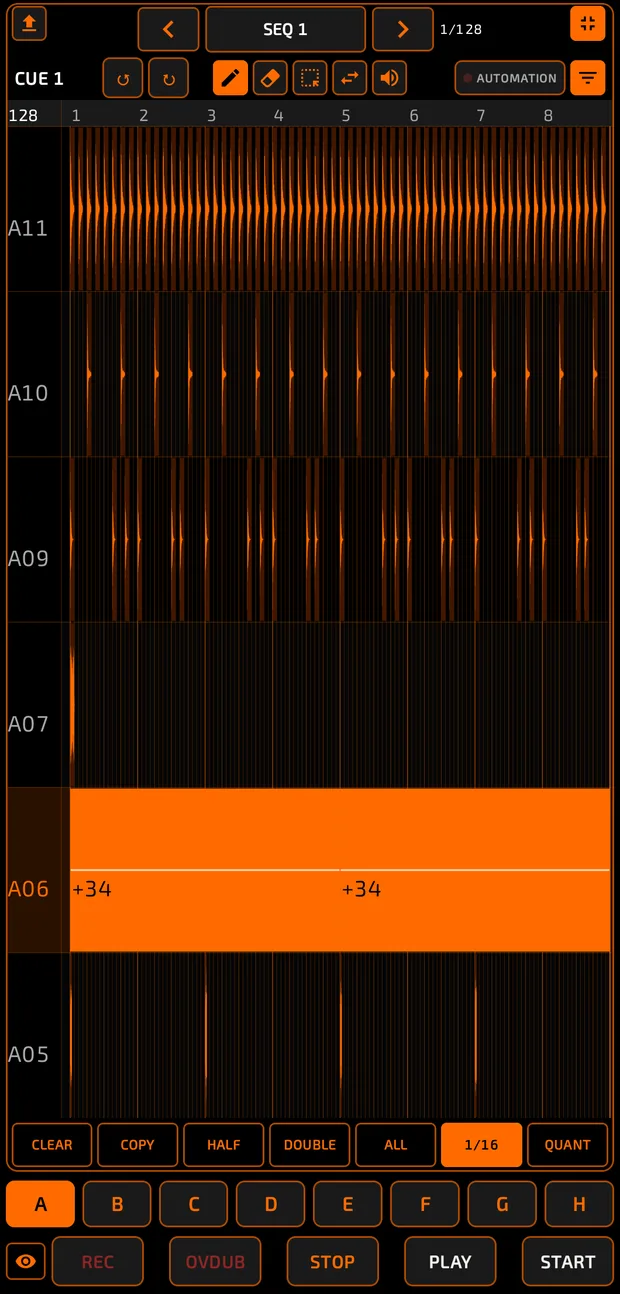
- Undo and redo are in the middle strip. In full screen they move into the tool row.
- The expand icon (top right) makes the sequencer fill the screen. The transport stays visible.
Automation
 arms automation recording, and the status bar says so:

Record knob and fader moves into your sequence.
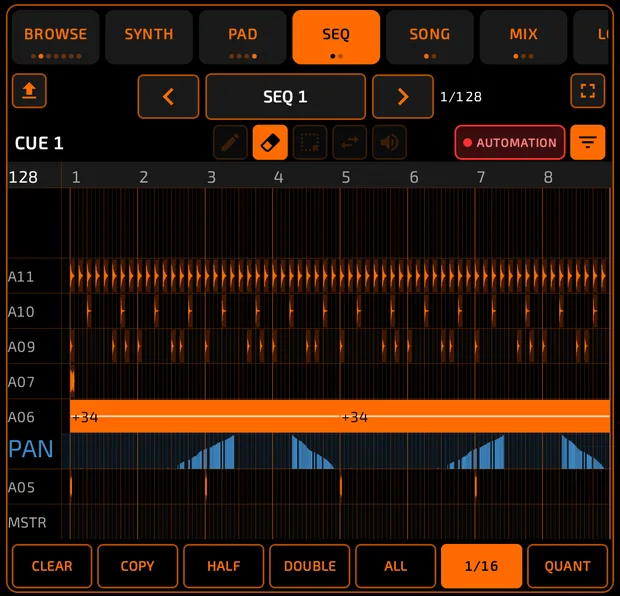
SEQ with AUTOMATION armed: colored sub-lanes (LVL, PAN, F0...) under pad lanes, the MSTR lane at the bottom, and the AUTOMATION chip lit red.
sequencer-automation.mp4
How to record automation
- Arm automation: the A button in the middle strip, or the AUTOMATION chip on SEQ or MIX. It pulses red and the status bar says AUTOMATION ENABLED.
- Press PLAY (recording isn't needed).
- Move a control. Its movement is written into the current sequence. Controls you don't touch keep playing back what's already there.
- Disarm when you're done. The moves play back every loop.
What you can automate
Pad level, pan, pitch (semi and fine), mute and solo; bus and master levels; any effect setting and effect mix (on pads, buses or master); and any synth setting. MIDI knobs record automation too.
How to erase automation
While armed, the eraser is the only tool and extra lanes appear under each pad: LVL, PAN, SMI (semi), FIN (fine), MTE (mute), SLO (solo), MIX, F0, F1... (effect settings) and S0, S1... (synth settings). MSTR and BUS1 to BUS8 lanes hold master and bus moves.
- Tap or drag across a lane to erase it bit by bit (one SNAP step at a time).
- Tap a lane's label and choose ERASE LANE to clear the whole lane.
Recording mutes
With M set to PAD MUTE or PAD SOLO, mutes you play while recording are saved as red boxes on the lanes.
Note repeat while recording

With note repeat on, each repeat is recorded as its own note, snapped to the note repeat speed. See Pads.
Exporting stems
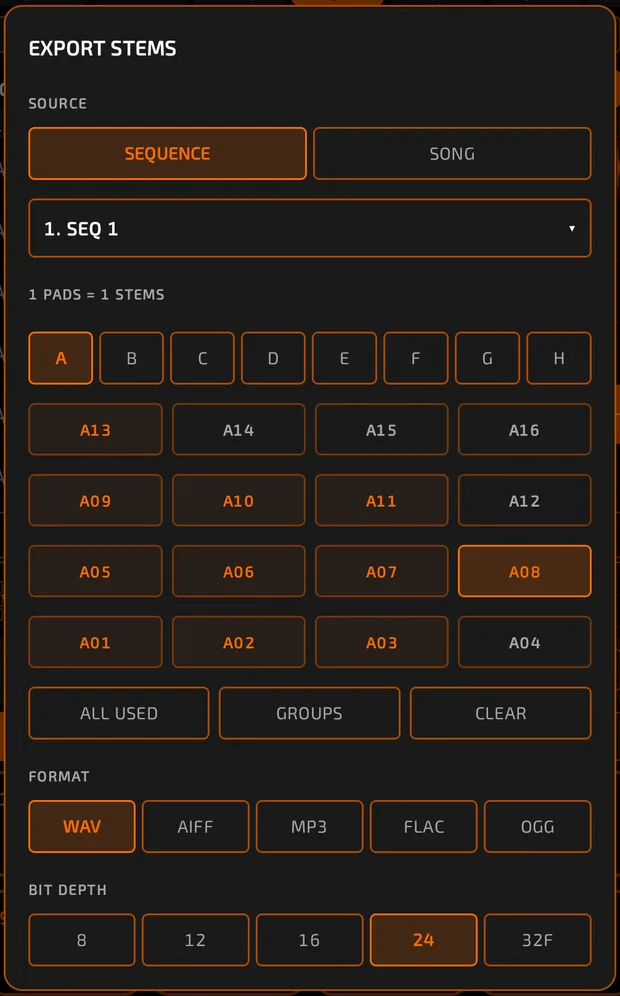
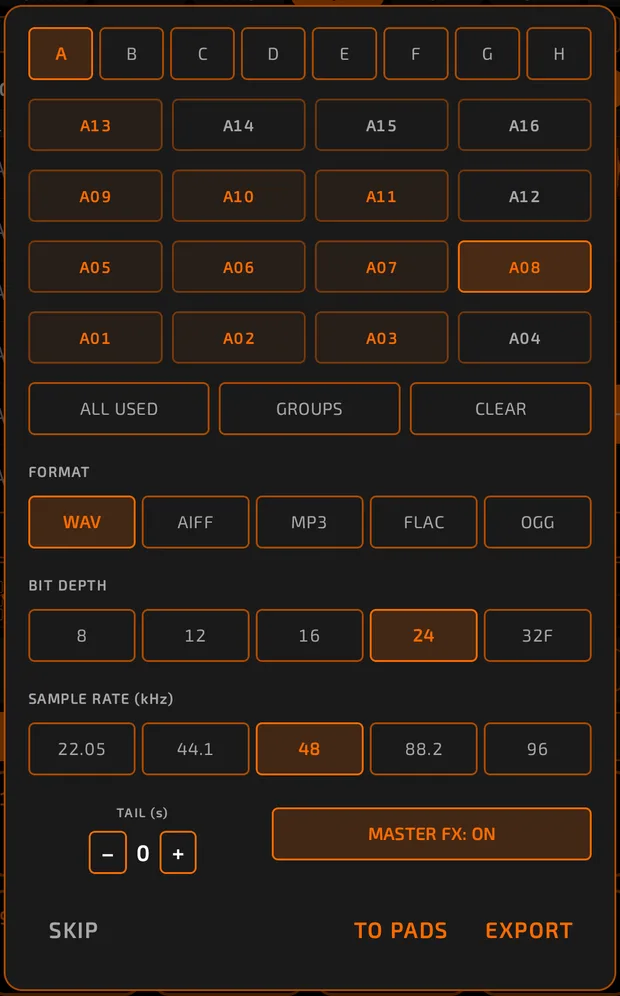
The export icon at the top-left opens  EXPORT STEMS. See Projects and Export.

Tips
- Double-tap
 STOP if anything gets stuck: it stops everything and resets to bar 1.
 - Record drums with REC, then add melodies with OVDUB.
- Use COPY before trying a big change, so you can compare versions.