 Chop Sampler
User Guide / MIDI
MIDI
Play Chop from a MIDI keyboard or pad controller, map knobs and buttons to almost anything, play external synths from Chop, sync with other gear, and import or export MIDI files.
Connecting a controller
USB
- Plug in a class-compliant USB MIDI controller (most keyboards and pad controllers are).
- Open Settings > MIDI and make sure MIDI INPUT is on (it is by default).
- Your device appears by name. Start playing.
Android can't use devices that need a special driver on a computer. Check Help > SUPPORTED GEAR in the app for tested gear.
Bluetooth
- Open Settings > MIDI.
- Tap CONNECT BLUETOOTH MIDI.
- Pick your controller in Android's device picker.
No location permission is needed. Once paired, it works just like a USB controller.
What your controller plays
With nothing mapped:
- Drum pads: MIDI note 36 plays pad A01, note 37 plays A02, and so on up through the banks. Hitting a pad also selects it, so mapped LEVEL / SEMI / PAN knobs follow the pad you just played. Empty pads flash so you can see where notes land.
- Melodic play: note 60 (middle C) plays a pad at its normal pitch. This happens when a synth pad is set to a MIDI channel, when the piano roll is open, or in TUNE mode.
- Pad modes: in SCALES, NOTES, CHORDS and PROGRESS., your keyboard plays that mode. See Pad Modes.
Playing several synths at once
Give each synth pad its own channel:
- Select a synth pad and open PAD > LOGIC.
- Tap MIDI: FOLLOW and choose CHANNEL 1 to CHANNEL 16.
A pad set to a channel always plays from that channel. FOLLOW SELECTION plays whichever pad is selected.
Expression
- Pitch bend: bends synth notes (up to 2 semitones).
- Mod wheel: adds vibrato on many synths.
- Sustain pedal: holds notes until you lift it (drum pads aren't held).
- Aftertouch: passed to synth pads.
Panic: double-tap STOP to stop all sound and release every note, including on external gear.
MIDI LEARN


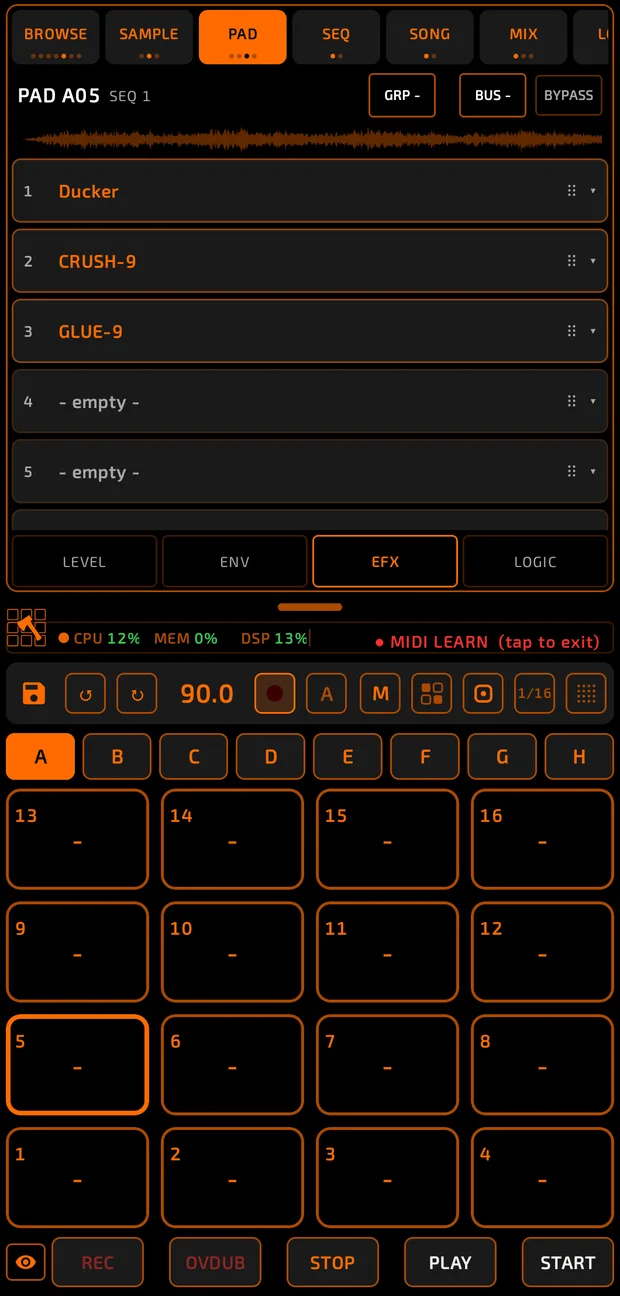
Map controller keys, pads, knobs and buttons to Chop.
MIDI LEARN active: the red "MIDI LEARN (tap to exit)" banner over the status bar, pads showing learned note names, one control pulsing red.
midi-learn.mp4
How to map a pad
- Open Settings > MIDI and tap MIDI LEARN. Settings closes and a red ● MIDI LEARN (tap to exit) banner appears.
- Tap a pad. It pulses red.
- Hit a key or pad on your controller. Done: the pad shows the note it learned.
- Repeat for other pads, then tap the banner to exit.
Pad maps are saved per controller, so each device keeps its own layout.
How to map a knob or button
- Turn on MIDI LEARN.
- Tap a control in Chop. It pulses red.
- Move a knob or press a button on your controller.
Controls that are already mapped show a red outline while learn mode is on.
What you can map
- Transport: REC, OVDUB, STOP, PLAY, START.
- Save, undo and redo.
- The selected pad's LEVEL, SEMI, FINE and PAN.
- Sample editor: START and END flags, ZOOM, SCROLL, CROP, TO PAD and DELETE (mapped edits happen instantly, and can be undone).
- Hundreds of synth knobs and sliders.
- GLITCHER controls.
- Mixer mute and solo.
Knob moves from MIDI record automation just like moving the control on screen.
Clearing maps
Settings > MIDI > RESET MIDI MAP, then tap TAP AGAIN TO CLEAR ALL. This clears every pad and control mapping for every device. To change one pad, just learn it again.
ENCODER MODE
Settings > ENCODER MODE sets how mapped knobs (sample start/end, zoom, scroll) read your controller:
- AUTO (default) works out your knob type by itself. Leave it on AUTO.
- ABSOLUTE, RELATIVE 1, RELATIVE 2, RELATIVE 3: only if a knob still moves the wrong way or spins forever.
Knobs never jump: a mapped flag moves from where it is and reaches the edge of the screen when the knob reaches its end. Turn slowly for fine moves; zoom in for sample-accurate edits.
MIDI OUTPUT: play external instruments
- Turn on Settings > MIDI > MIDI OUTPUT.
- Set OUT CHANNEL (for synth pads set to FOLLOW) and DRUM CHANNEL (for sample pads; 10 by default).
Now your pads and the sequencer play your external gear. Sample pads send note 36 and up (pad A01 = 36). Synth pads send pitched notes on their own channel, or the OUT CHANNEL.
Sync
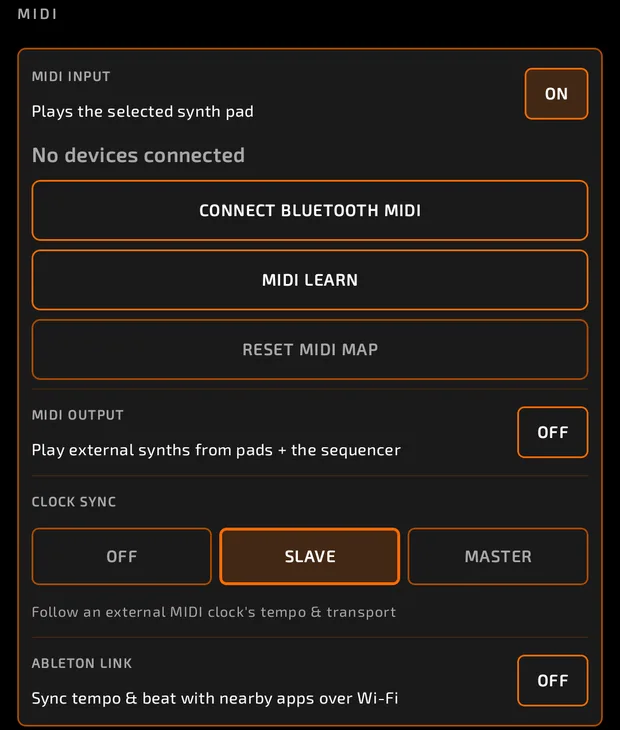
In Settings > MIDI:
- CLOCK SYNC:
- OFF: Chop keeps its own time.
- SLAVE: follow another device's MIDI clock, tempo and start/stop.
- MASTER: send MIDI clock and start/stop to other gear.
- ABLETON LINK: sync tempo and beat with nearby apps over Wi-Fi. START/STOP SYNC shares play and stop too. Turning Link on turns CLOCK SYNC off.
Control surface
Settings > CONTROL SURFACE > MACKIE CONTROL lets a Mackie Control (MCU) compatible surface run the mixer: 8 channel faders, mute, solo, pan, the master fader and transport, with motor faders and lights. Its BANK and CHANNEL buttons page through channels.
While it's on, all incoming MIDI is treated as control-surface messages, so normal note playing and learn are paused. It needs a class-compliant USB MIDI interface.
MIDI files
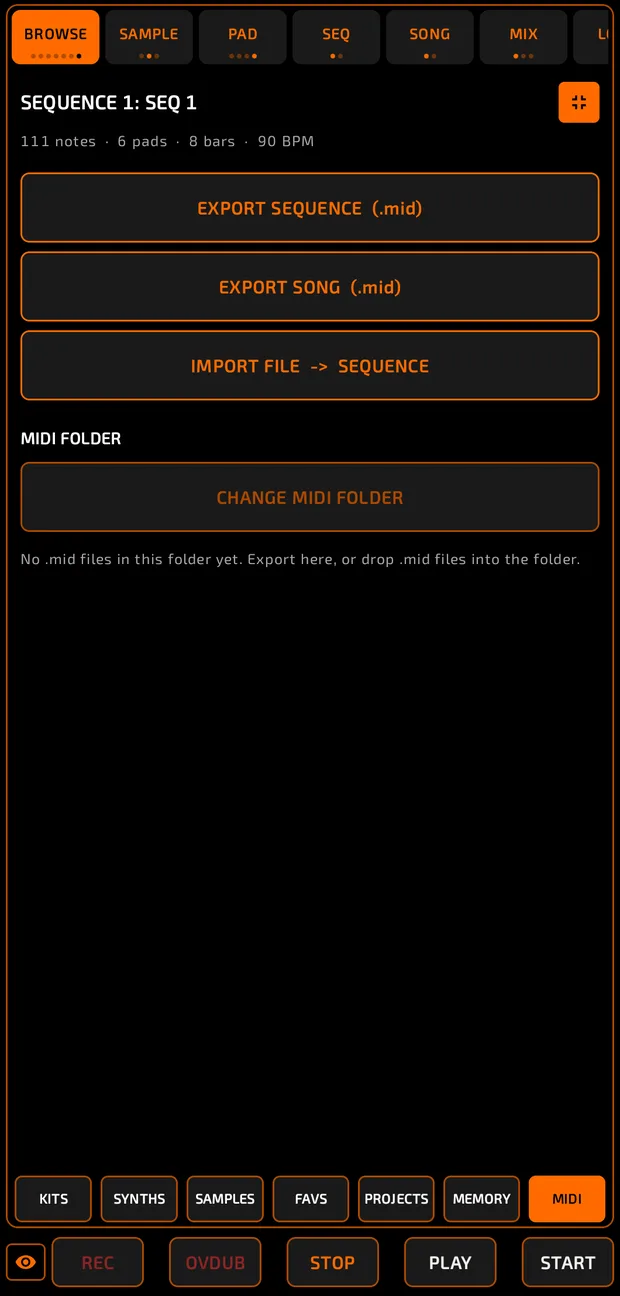
Open  BROWSE > MIDI.
Export
- EXPORT SEQUENCE (.mid): the current sequence, one track per pad.
- EXPORT SONG (.mid): the whole song, with tempo changes.
Files exported from Chop come back onto the same pads when you import them.
Import
- Tap IMPORT FILE -> SEQUENCE and pick a file, or set a MIDI FOLDER to list your files here.
- Tap a file to import it into the current sequence, then choose REPLACE (also takes the file's tempo) or MERGE (adds on top).
- Or long-press a file to put all its notes on one pad (IMPORT TO PAD).
Drum tracks map note 36 to pad A01. Melodic tracks go onto pads starting at the selected pad. You can also import onto one pad from the piano roll.
Tips
- Map PLAY, STOP and REC to controller buttons for hands-free recording.
- Map a knob to the sample editor's END flag to scrub chop points by ear.
- Watch incoming and outgoing MIDI in the Resources window's
 MIDI tab.